Example Copper Roofing Projects in Irving

Five copper jobs, from one chimney to a whole house, each with the house, what the owners want, the work and a rough price.

These are examples, not past jobs, clients or addresses. They are put together from the ages of local homes, the way copper work is done and 2026 price ranges, so you have a starting point before you ask for a quote.

Standing seam copper over a 1980s brick house

Example project
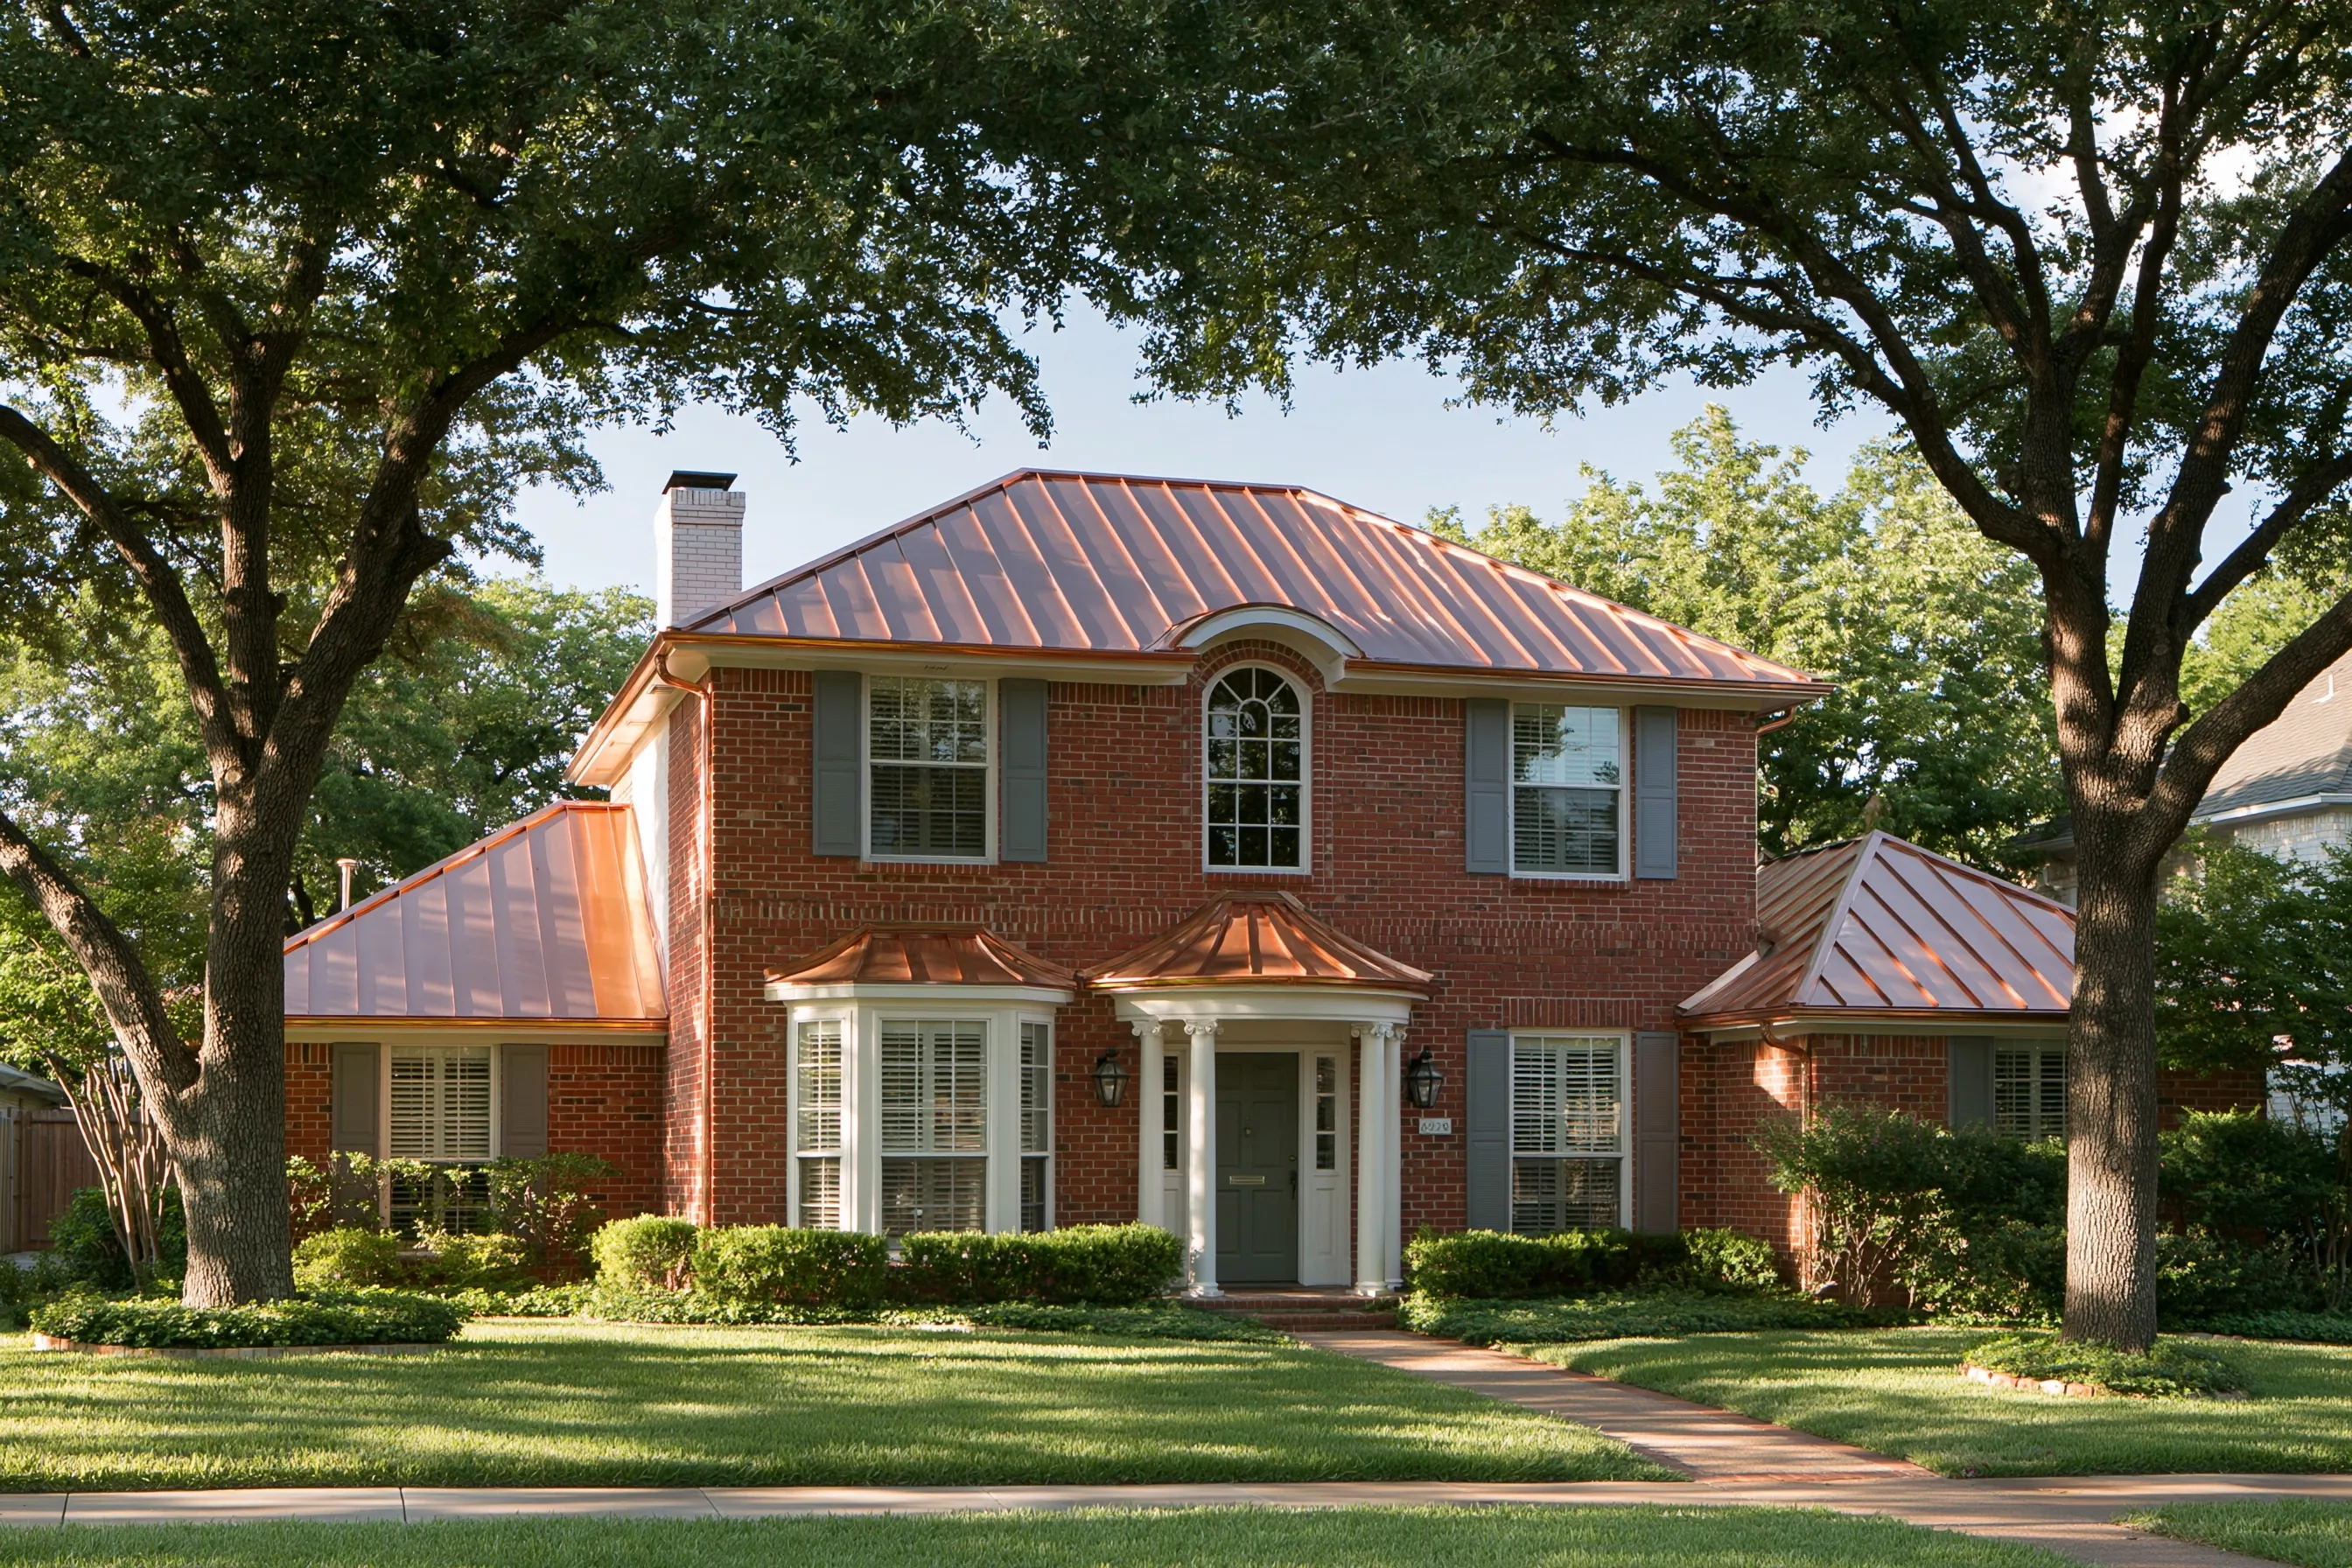
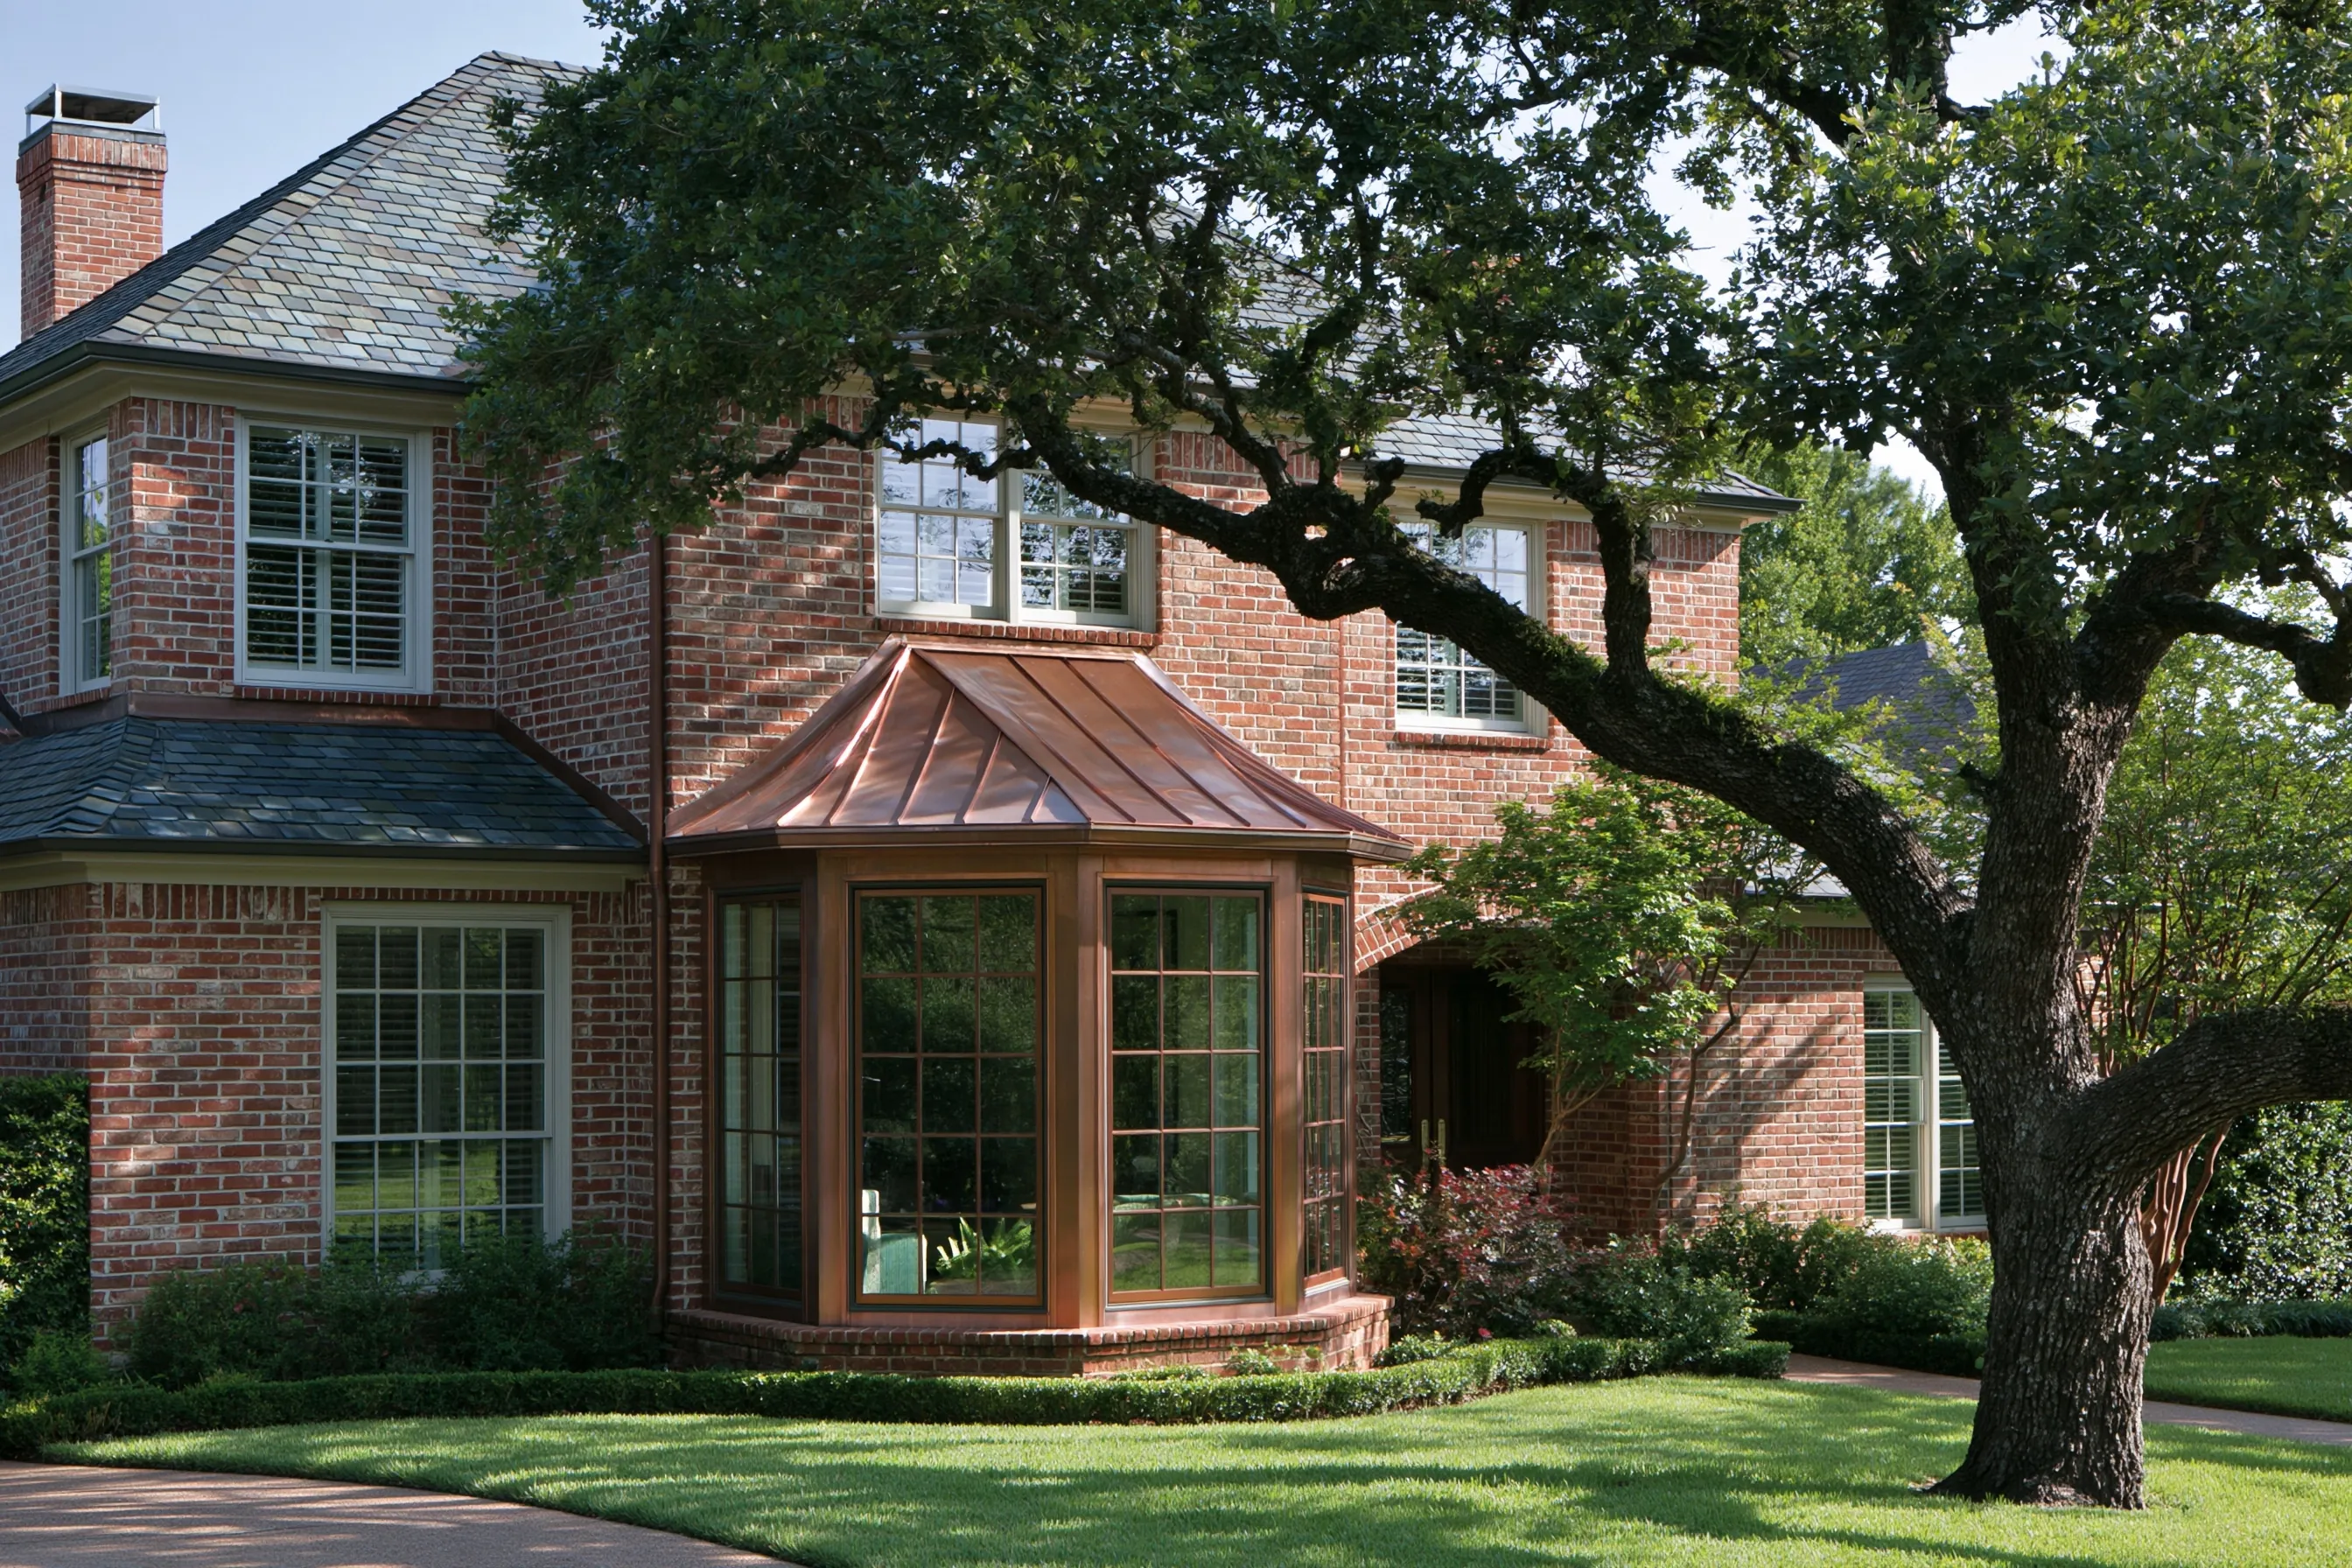
Red-brick two-story house with copper standing seam roofs on the main house, two side wings, a bay window and the entry porch
Home
1980s two-story brick house in Irving with two one-story wings
Original request
Copper instead of a third set of shingles
Roof
Main hip roof, both wing roofs, the bay window and the entry porch, about 2,200 sq ft
Copper
16 oz standing seam on clips, with copper flashing at the chimney, walls and hips
Permit
Irving reroof permit, no plans needed
Estimated cost
$74,800

Scope of work

Shingles taken off one section at a time, decking checked and repaired, underlayment, 16 oz copper standing seam panels on clips over the main roof, both wings, the bay window and the entry porch, copper flashing at the brick walls, the chimney and every hip, edge trim, and a magnet sweep of the yard.

Project overview

In this example, the owners of a 1980s brick house in Irving are due for a new roof and want copper rather than shingles again. The house has a main hip roof, two one-story wings, a bay window and a small entry porch roof, all to be done at once so the copper weathers evenly.

In this example the old roof comes off down to the decking, so the price allows for checking every board. Copper grows and shrinks with the heat, so the panels sit on clips that let them slide, and every joint with the brick and the chimney is flashed in copper rather than another metal.

The goal

The goal is a house under one copper roof that weathers to one color, wings and porch included.

Process

  1. Approval HOA rules checked, then the Irving reroof permit pulled.
  2. Survey Main roof, wings, bay and porch measured; decking looked at from the attic.
  3. Shop work Panels run to length; hip caps, wall flashing and the bay and porch pieces bent.
  4. On the roof One section stripped, repaired, underlaid and clipped before the next is opened.
  5. Handover Flashing checked at the chimney and walls, the yard swept for nails, final inspection.

Planning right

  • Get the price per sheet of new decking in writing, since nobody knows how many until the shingles are off.
  • Doing the wings, bay and porch with the main roof means one color as the copper darkens.
  • Heavier copper still dents in hail. It is chosen for stiffness, not for hail.
  • If your neighborhood has an association, get its approval before the copper is ordered.
Get a free quoteMore about standing seam copper roofs

Copper roof over a wide bay window in Coppell

Example project

Five-sided bay window with a copper standing seam roof on a red-brick two-story house with a gray shingle roof
Home
1990s two-story brick house in Coppell
Original request
A copper roof on the front bay window, main roof unchanged
Bay
Five-sided bay, about 55 sq ft of roof
Copper
Standing seam on a small hip, with counter flashing cut into the brick
Main roof
Gray shingles left as they are
Estimated cost
$5,600

Scope of work

The old covering on the bay taken off, the deck checked, underlayment, copper standing seam panels shaped to the five sides of the hip, copper counter flashing set into a cut brick joint, and edge trim. The main roof is not touched.

Project overview

In this example, the owners of a 1990s brick house in Coppell want the wide bay window at the front to stand out, without replacing the main roof. The bay roof is a small five-sided hip, about 55 sq ft.

Small roofs with many sides cost more per foot than a big plain one, because each panel is cut and folded to fit. Where the bay meets the brick, the flashing goes into a cut mortar joint, so it does not rely on caulk.

The goal

The goal is a dry bay with a copper roof that sets off the front of the house, and a main roof left alone.

Process

  1. Survey Bay measured, the deck and the joint with the brick checked from a ladder.
  2. Shop work Panels and hip caps cut and folded to the five sides.
  3. On the bay Old covering off, underlayment on, panels fitted and the brick joint cut for the flashing.
  4. Handover Joints checked and the beds below cleared of offcuts.

Planning right

  • Ask Coppell Building Inspections whether a bay roof alone needs a permit.
  • Coppell asks every contractor working in the city to register first.
  • Copper runoff can stain pale stone or concrete below. The bed under this bay takes the drip.
  • An association may want to see the color change, so ask before the copper is ordered.

Get a free quoteMore about copper bay window and accent roofs

Half-round copper gutters on a 2000s brick house

Example project

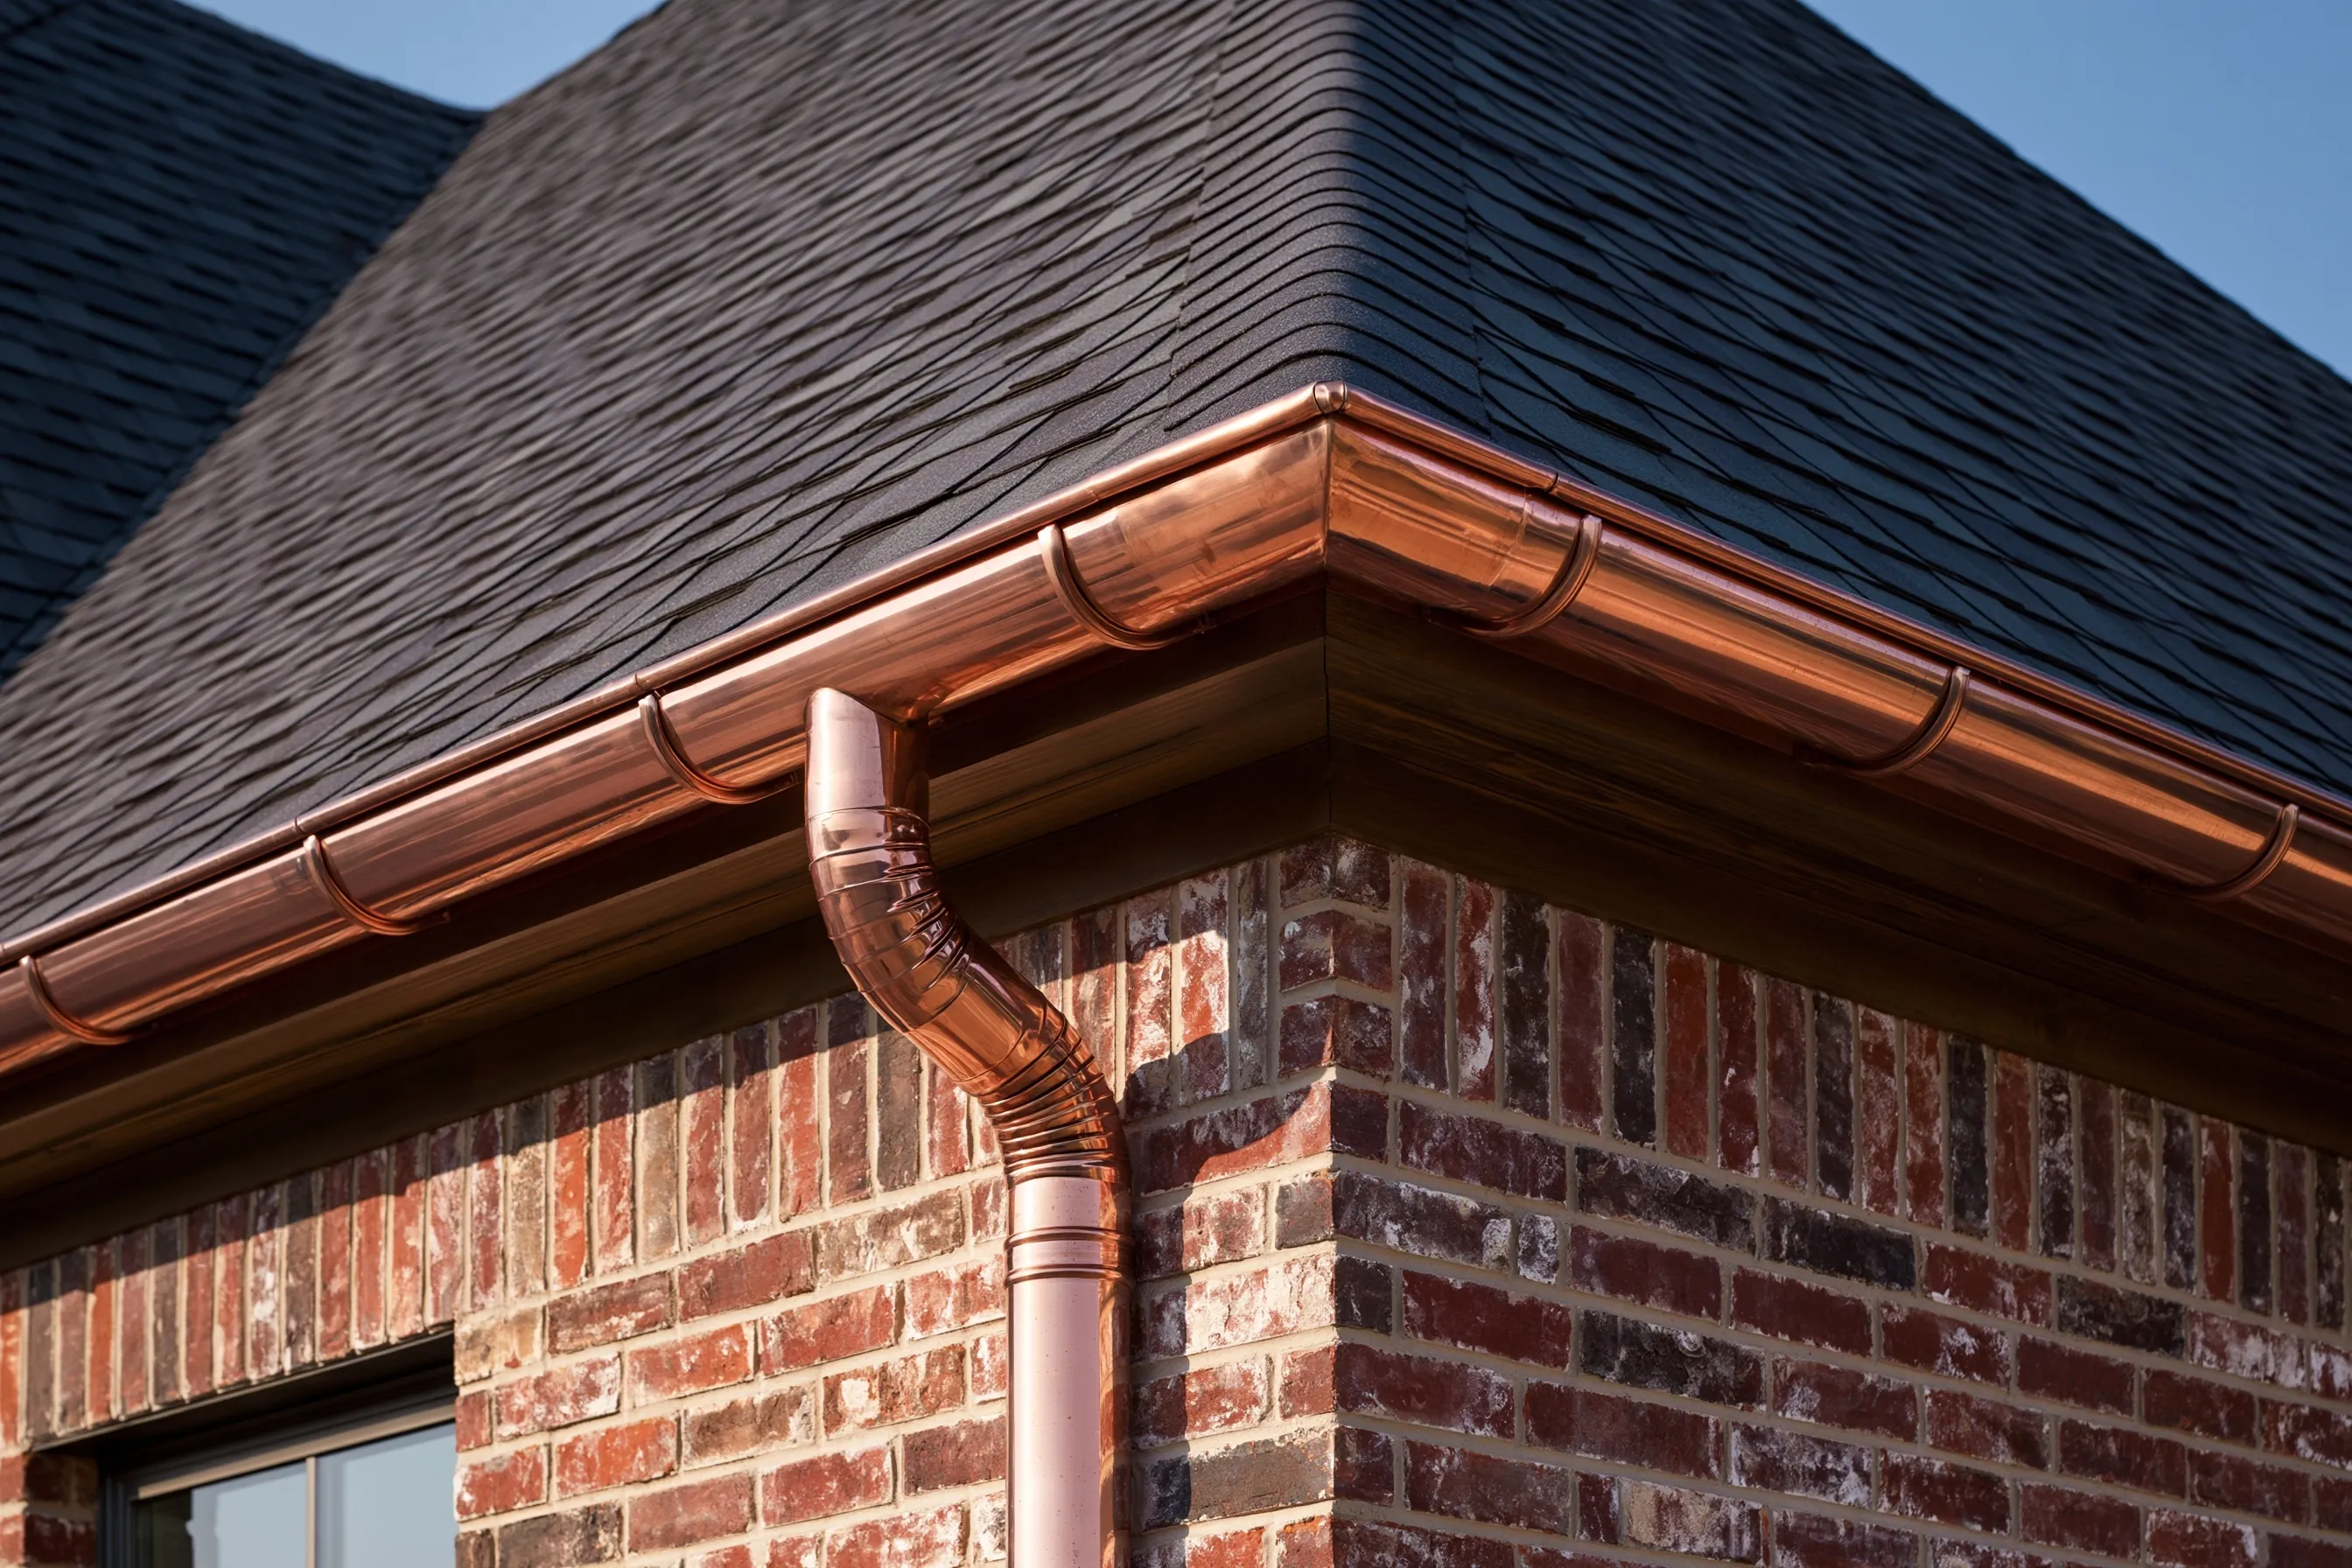
Half-round copper gutter on exposed hangers turning a brick corner, with a round copper downspout under a dark shingle roof
Home
2000s brick house in Irving with a dark shingle roof
Original request
Replace dented aluminum gutters with copper
Gutters
About 140 ft of half-round copper on exposed copper hangers
Downspouts
Four round copper downspouts, about 40 ft in all
Corners
Soldered outside corners and end caps
Estimated cost
$6,000

Scope of work

Old aluminum gutters and downspouts taken down and hauled away, fascia checked, about 140 ft of half-round copper gutter hung on copper hangers with soldered corners and end caps, four round copper downspouts with bent offsets, and the ground cleaned up.

Project overview

In this example, the owners of a 2000s brick house in Irving have aluminum gutters that are dented and pulling away at the corners. They want copper that suits the brick and does not need painting.

Half-round gutters on exposed hangers show off the copper, and the corners are soldered rather than sealed with caulk. The downspouts run down the brick corners with a bend at the top, so they sit close to the wall.

The goal

The goal is copper gutters that carry water off the roof and away from the house, with no joints left to caulk.

Process

  1. Survey Runs and downspout spots measured, fascia checked for soft wood.
  2. Shop work Gutter lengths, corners and downspout offsets made up.
  3. On site Old gutters down, copper hangers set, gutters hung and corners soldered, downspouts fixed.
  4. Handover Each run tested with a hose and the ground cleared.

Planning right

  • In Las Colinas, check with the association before replacing gutters.
  • Copper and aluminum should not touch. All hangers and straps are copper.
  • Carry downspout water well away from the house. Wet clay beside a slab can make it move.
  • The bright copper turns brown, then slowly toward green over the years.

Get a free quoteMore about copper gutters and downspouts

Copper cap and flashing on a brick chimney

Example project

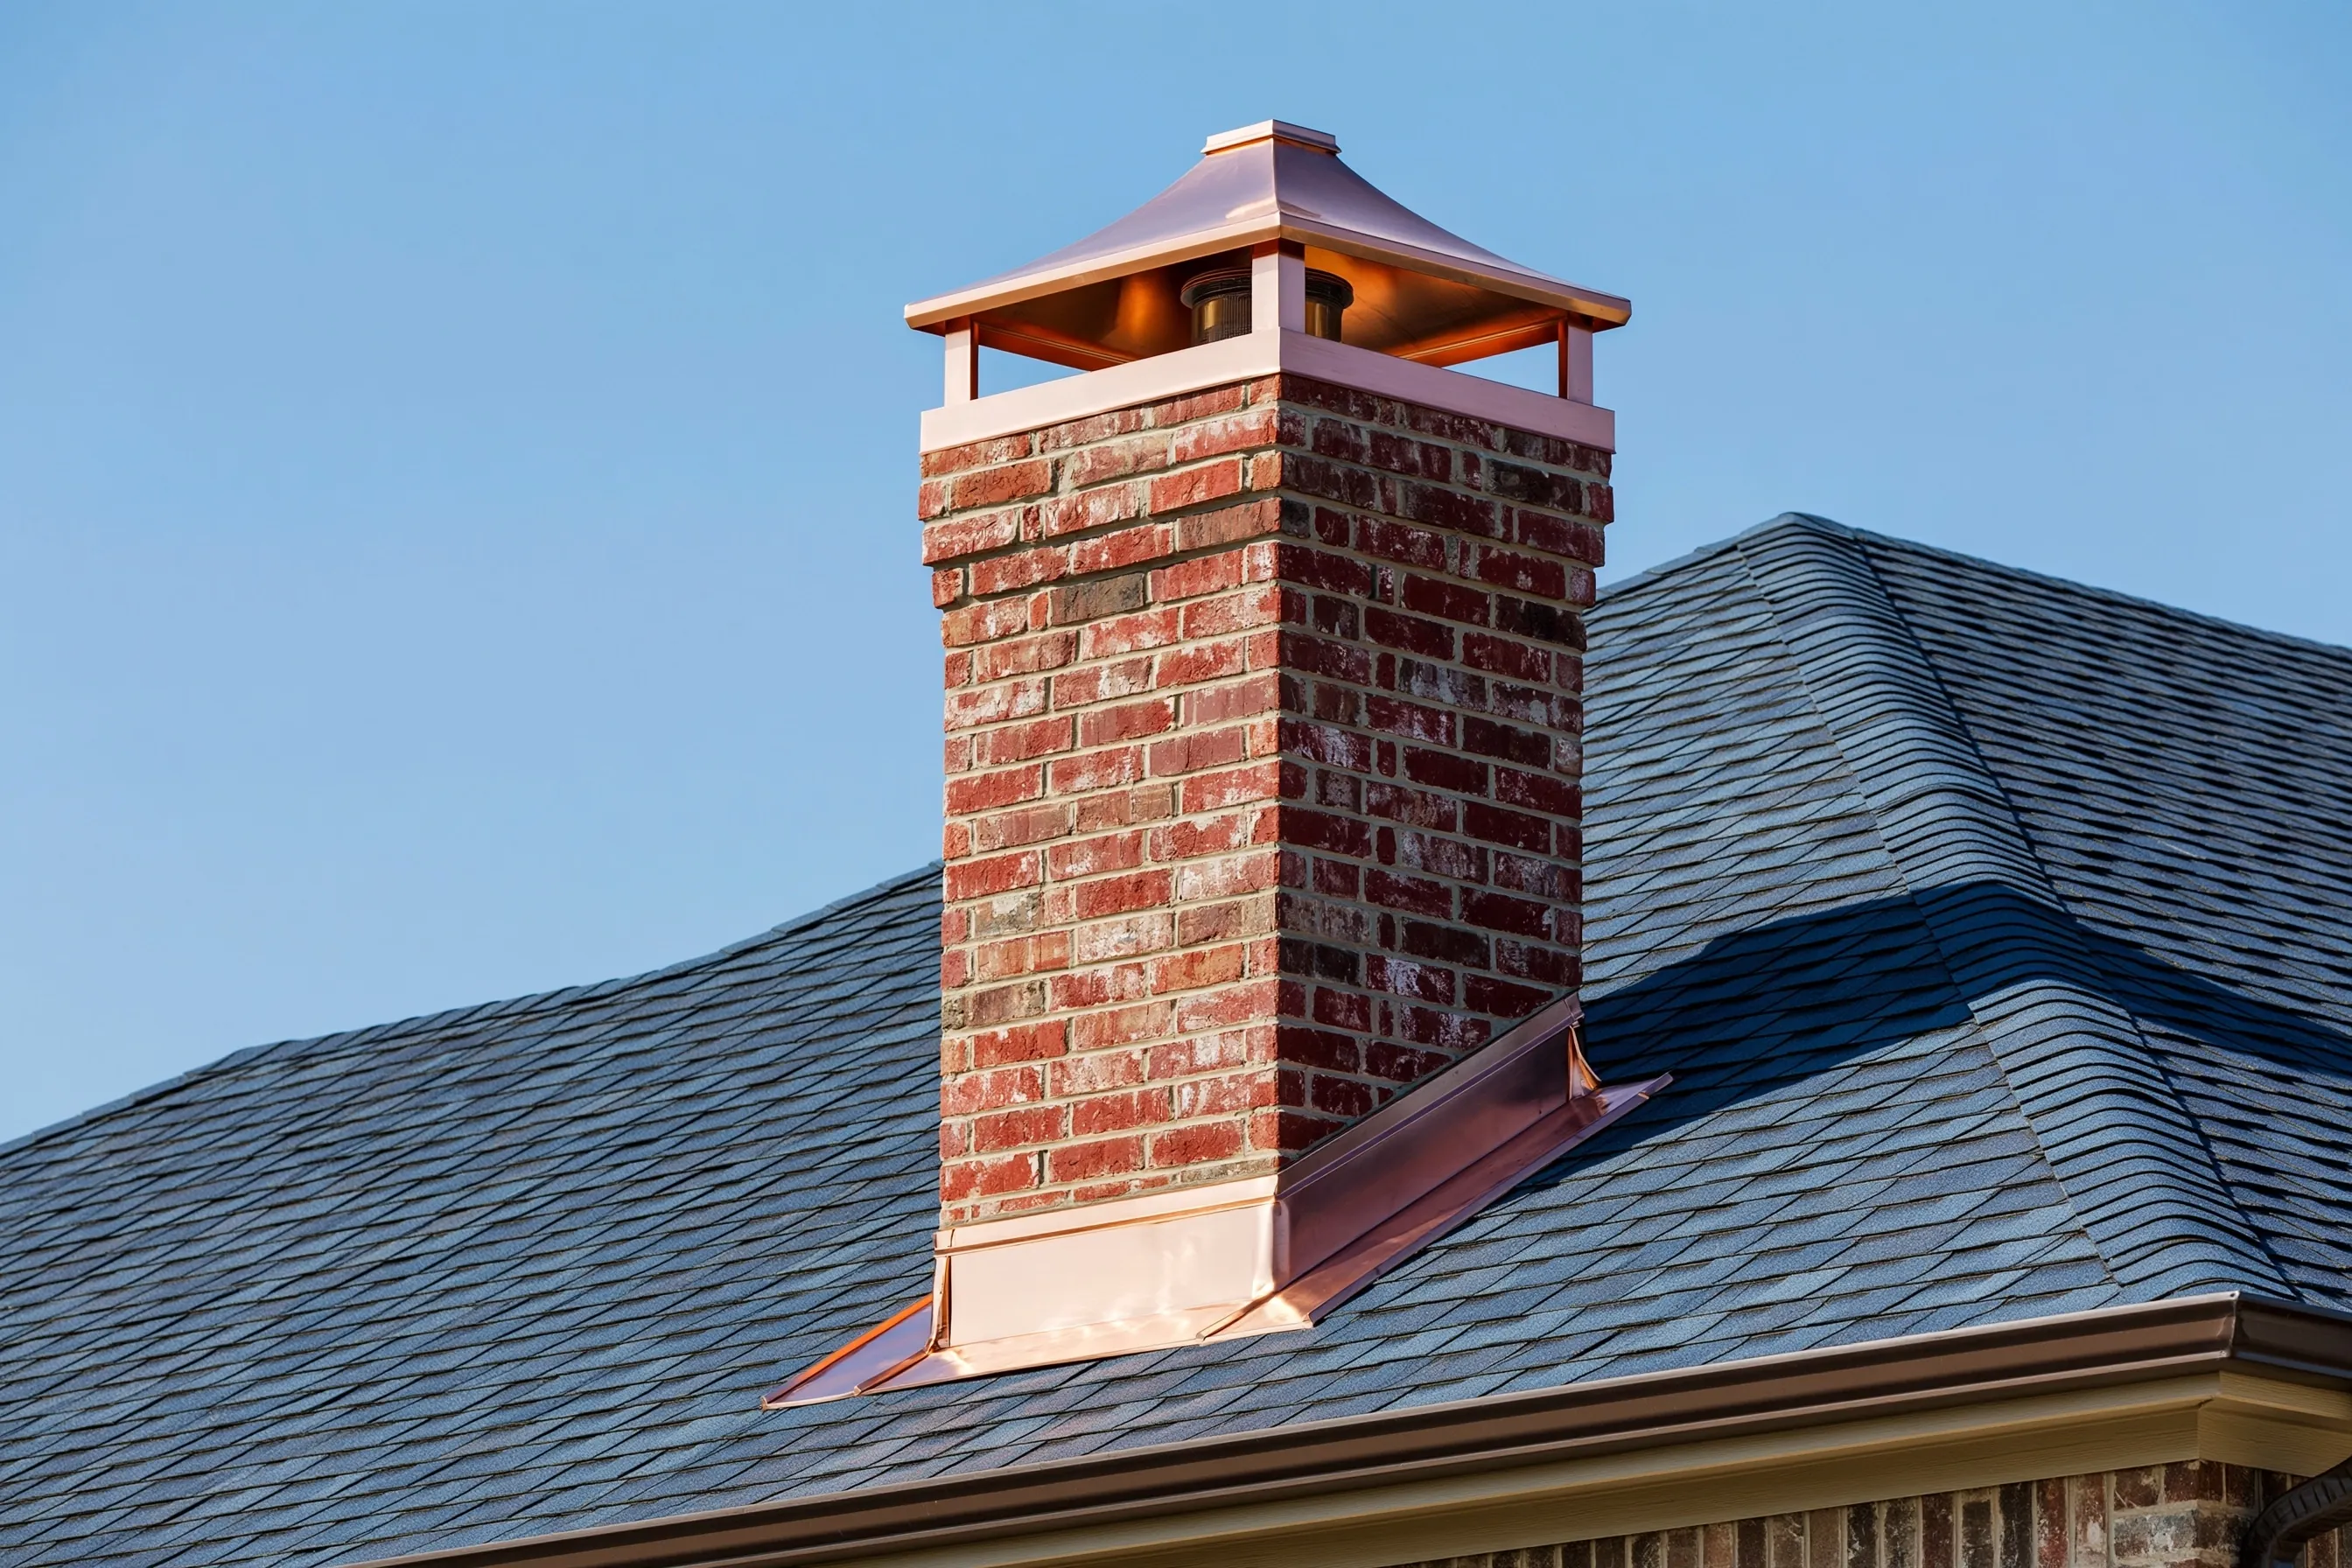
Brick chimney on a blue-gray shingle roof with a copper hip cap over the flue and copper flashing at its base
Home
2000s brick house in University Park with a shingle roof
Original request
Stop water at the chimney and keep rain out of the flue
Chimney
Brick, one round flue
Cap
Copper hip cap with open sides, made to measure
Flashing
Copper step, counter and front apron flashing
Estimated cost
$2,900

Scope of work

The chimney top measured, a copper hip cap with open sides made and fixed over the flue, old flashing taken out, copper step flashing woven into the shingles, counter flashing set into cut brick joints, a front apron, and the shingles around the chimney resealed.

Project overview

In this example, a 2000s brick house in University Park has a sound shingle roof, but water shows on the ceiling beside the chimney after heavy rain, and the flue has no cap.

Doing the cap and the flashing in one visit saves a second climb. The flashing that leaks is replaced in copper, with the top edge set into the brick, and the cap keeps rain and birds out of the flue.

The goal

The goal is a dry ceiling by the chimney and a capped flue, done in one trip to the roof.

Process

  1. Survey Chimney measured, flue size noted, the old flashing and brick joints checked.
  2. Shop work Cap, step pieces, counter flashing and apron bent to the chimney.
  3. On the roof Old flashing out, copper step and counter flashing in, apron fitted, cap fixed.
  4. Handover Shingles resealed and the attic checked for daylight at the chimney.

Planning right

  • Ask the city whether chimney work needs a permit before work starts.
  • Loose or crumbling brick joints should be repointed before new flashing goes in.
  • A cap with open sides lets smoke out and keeps rain off the flue.
  • A cap sized to the flue keeps rain out without choking the draft.

Get a free quoteMore about copper chimney caps and flashing

Hail check and panel repair on a copper roof

Example project

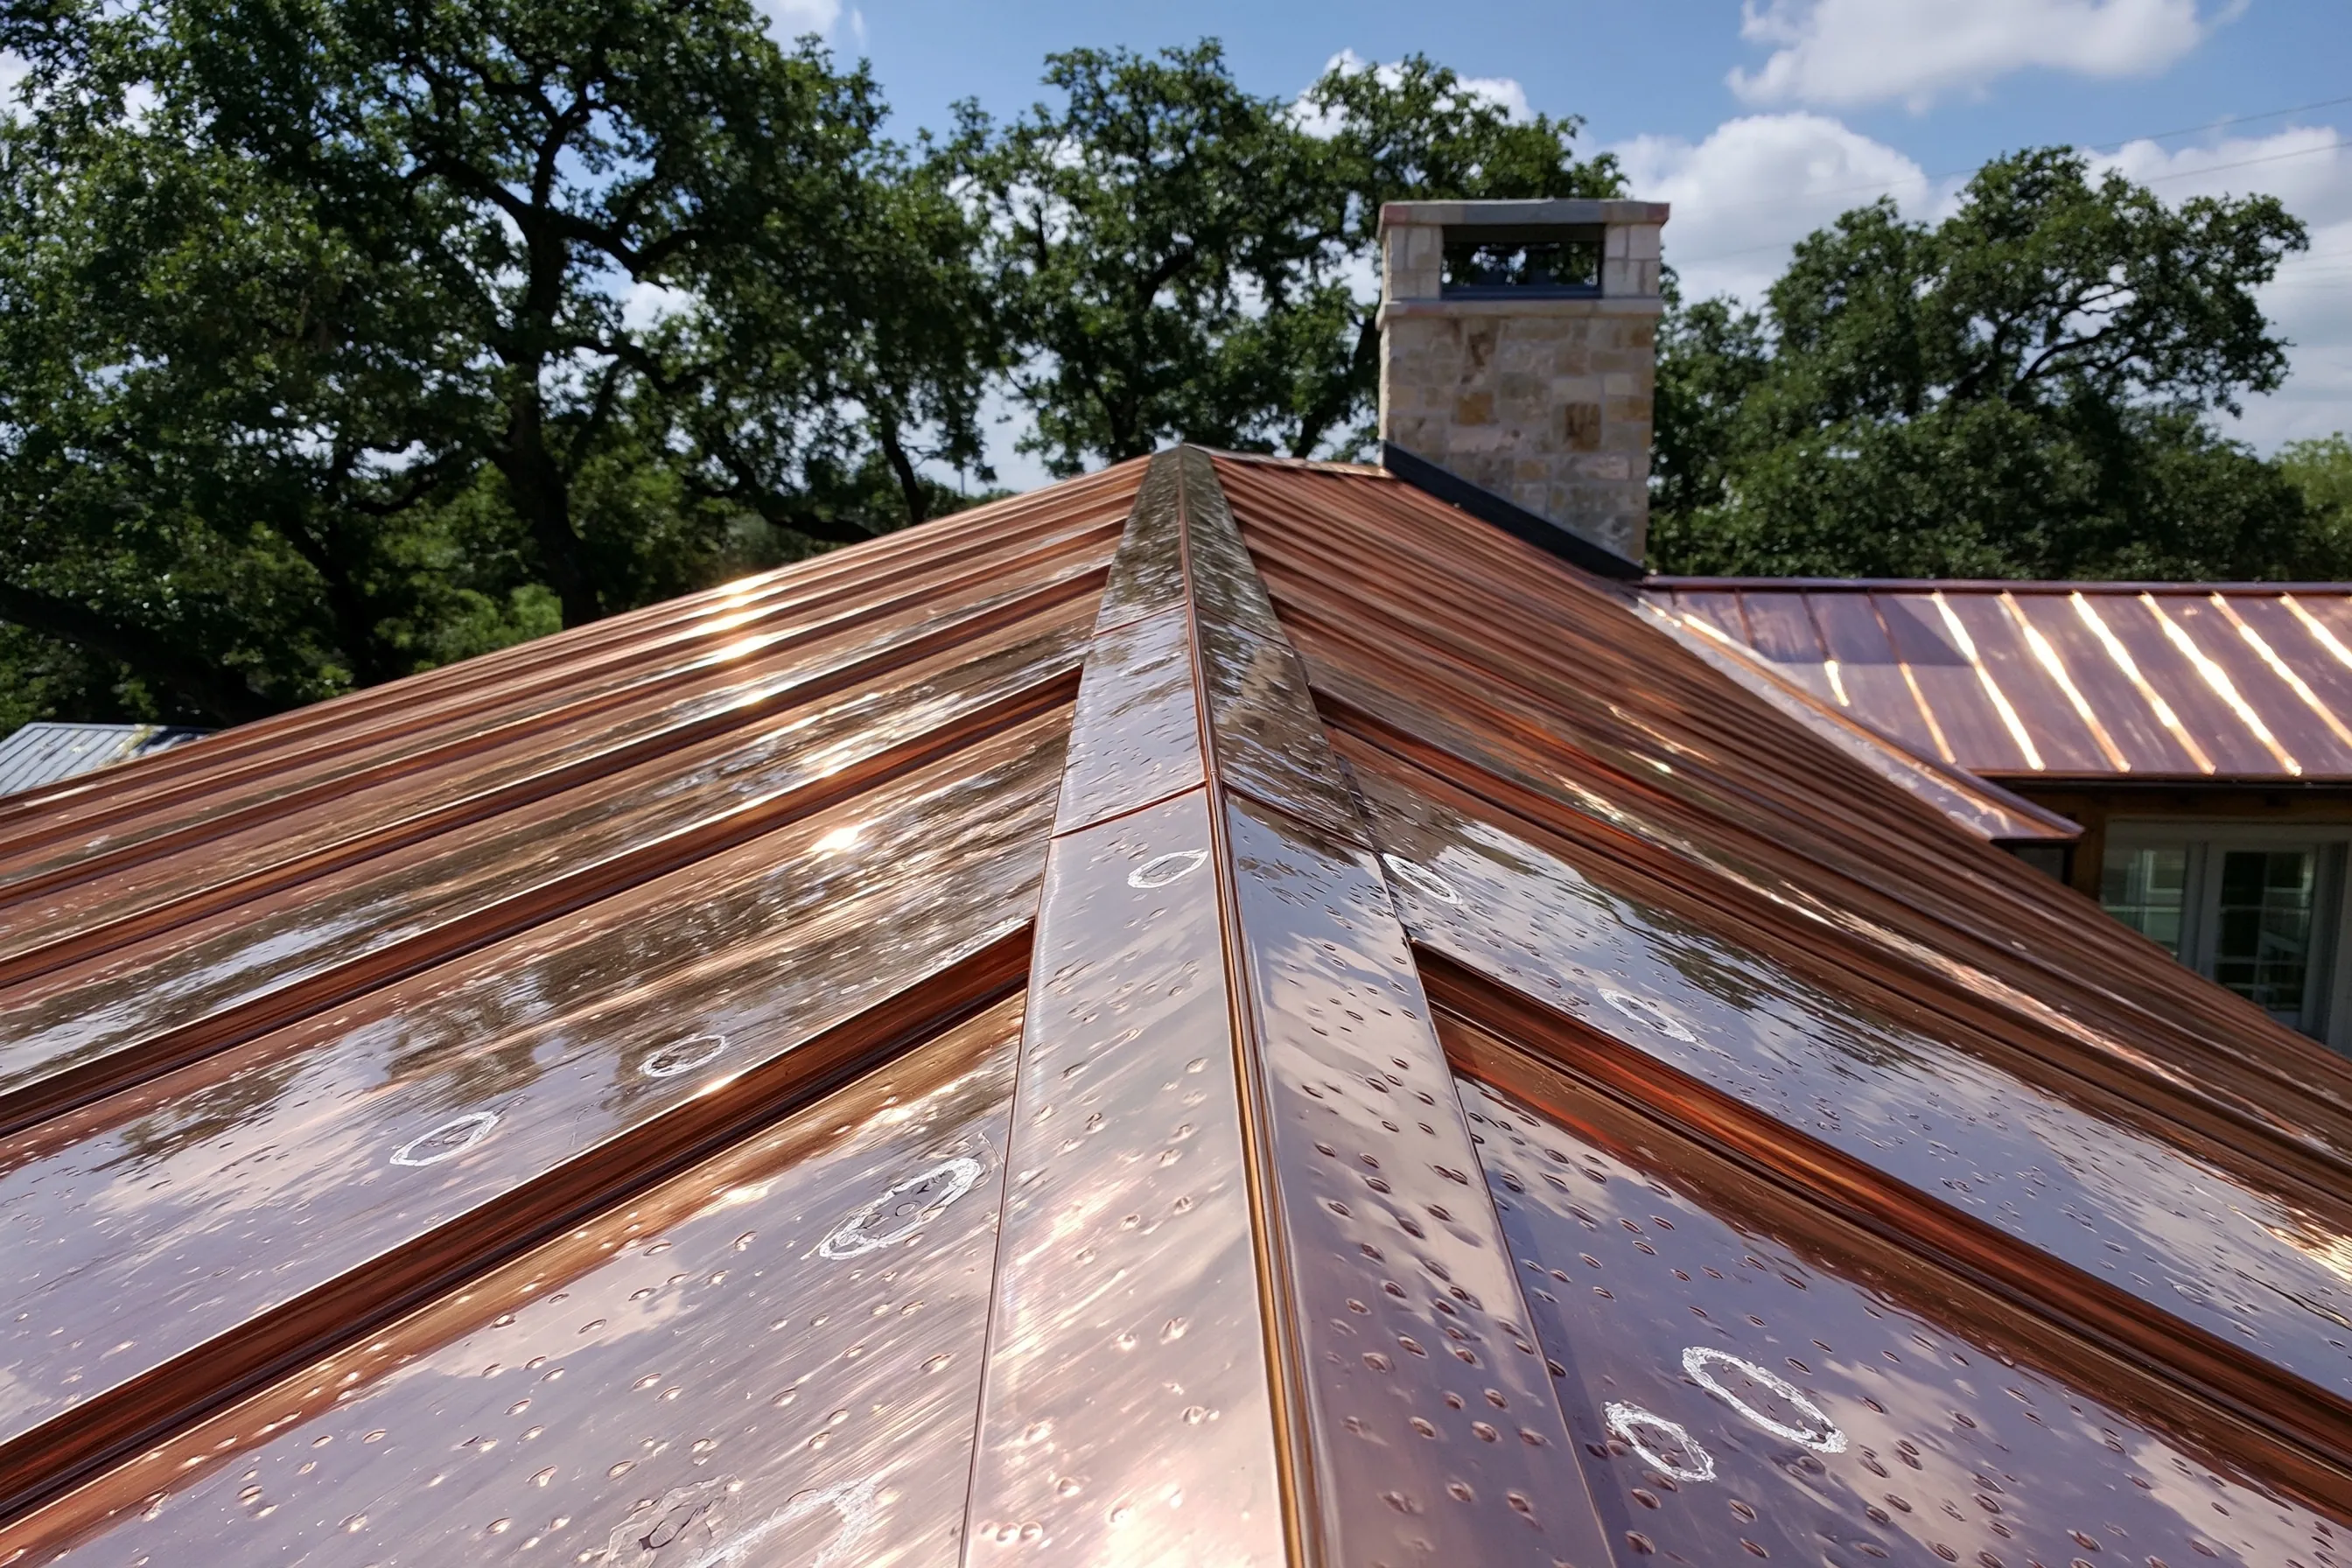
Copper standing seam roof with small hail dents, some circled in chalk, a copper hip cap and a stone chimney
Home
2000s house in Irving with a copper standing seam roof and a stone chimney
Original request
Check the copper roof after a spring hailstorm
What is found
Small dents across the roof; on one face beside the chimney they bend two seams
Repair
About 100 sq ft of panels replaced in matching copper
Report
Written findings with photos
Estimated cost
$5,400

Scope of work

A walk of the whole roof with dents circled in chalk, seams, hips and chimney flashing checked, the damaged panels on one face beside the chimney taken out and replaced with matching copper on clips, the hip cap refitted, and written findings with photos.

Project overview

In this example, the owners of a 2000s house in Irving with a copper roof hear hail in a spring storm and want to know what it did. Up close, small dents show across the roof, and each one is circled in chalk so it can be photographed.

Most dents on copper only change how it looks. What matters is whether a seam, hip or flashing has been bent open. Here that is limited to one face beside the chimney, so about 100 sq ft of panels are replaced and the rest of the roof keeps its dents.

The goal

The goal is a roof with no bent seams or open joints, and a written record of what the storm did.

Process

  1. Inspection Every face walked, dents circled and photographed, seams and flashing checked.
  2. Findings A written report of what is cosmetic and what needs repair.
  3. Shop work Matching panels and a hip piece made up.
  4. On the roof Damaged panels out, new ones clipped and seamed, hip cap and chimney flashing refitted.

Planning right

  • Copper dents in hail. Heavier copper dents less, but it still dents.
  • At about 100 sq ft, this repair is right at the size where Irving asks for a permit, so we check first.
  • We put the findings in writing and leave insurance questions to you and your insurer.
  • New panels start bright and darken to match the rest of the roof over time.

Get a free quoteMore about copper roof repair and hail damage

Request a free copper roofing quote

Tell us which roof, gutter or chimney you have in mind, roughly how big it is, what covers it now and where the house is. Photos help. We'll get back to you soon with an estimate or any questions we have. Estimates are free and there's no obligation.

Call (972) 585-5624

Call (972) 585-5624